On Wednesday, January 31st, weather willing, we will be able to view a total eclipse of the Moon. The Moon will move into full eclipse in the early hours of the morning and will be in partial phase in the western sky as the Sun rises. The Total Lunar Eclipse will develop over the course of about 3 hours. It’s a perfect opportunity to capture some snapshots of the event. Read further to find out what happens during the eclipse and how to capture it photographically.
|
|
||
| Moon below the horizon | Moon’s eastern limb enters the penumbra | 2:51 am PST |
| Partial eclipse begins – 1st Contact | Moon’s eastern limb enters the umbra | 3:48 am PST |
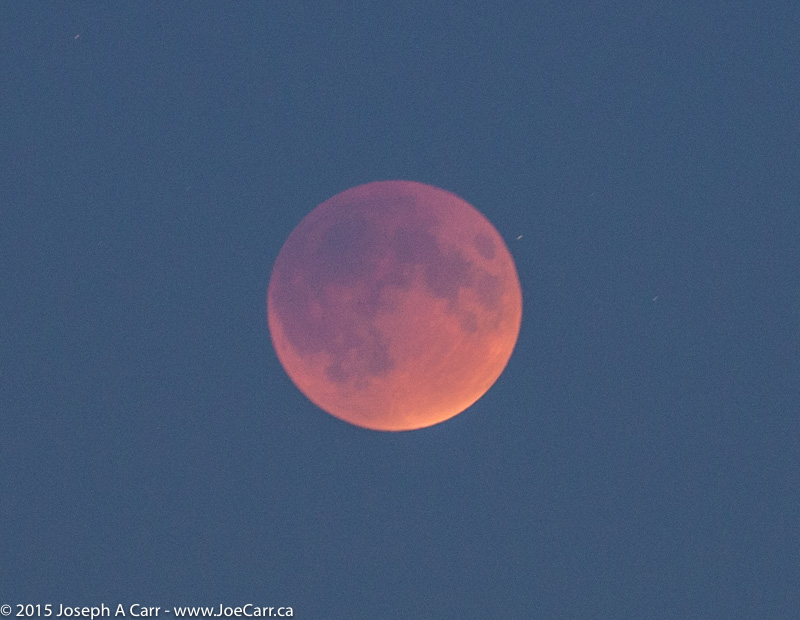
| Total eclipse starts – 2nd Contact | Moon entirely in the umbra; deep orange red |
4:52 am PST |
| Totality | 5:30 am PST | |
| Total eclipse ends – 3rd Contact | 6:08 am PST | |
| Partial eclipse ends – 4th Contact | Moon’s western limb leaves the umbra | 7:11 am PST |
| Sunrise | 7:48 am PST – approximate | |
| Eclipse ends | Moon leaves the penumbra | 8:09 am PST |
What’s Happening
A total lunar eclipse occurs when the Earth comes between the Sun and the Moon. During a lunar eclipse the Moon’s position traverses the Earth’s shadow. The Moon’s first contact with the Earth’s shadow is at the outer band of the shadow called the penumbra. The light falling on the Moon is progressively blocked until at the moment of total eclipse the Moon is completely in the darkest central area of the Earth’s shadow called the umbra. At the point of total eclipse the process starts to reverse itself until the Moon is totally out of the Earth’s shadow.

Glossary
- limb – the outer edge of the Moon
- penumbra – the outer band of the Earth’s shadow
- umbra – the darker central area of the Earth’s shadow
- partial eclipse – the Moon is positioned within the penumbra
- total eclipse – the Moon is positioned totally within the umbra
Above Eclipse times are for Pacific Standard Time (PST) for the west coast of North America, and are calculated from UT as presented in the Observers Handbook 2018, pages 126-27.
Observing Tips
What do you need?
Everything from your eyes, binoculars and telescope are suitable. Bear in mind this is a long process and at this time of year dress warmly and bring a chair if you want to be comfortable.
Find yourself a location that has a clear horizon view of the west especially if you wish to view during the late stages.
Keep a log of what you see and note the time. Pay attention to how much of the light on the moon is obscured and if there are any colouration changes. During the total eclipse the Moon will take on a deep orange-red colour. The colour of the Moon is a function of contaminants in the atmosphere and varies from year to year.
Photographic Tips
Equipment
Any camera with the capability of setting shutter speeds and aperture settings manually will do fine. The ability to use interchangeable lenses will be an advantage for more detailed images of the Moon. For the darker parts of the eclipse, eg. totality you should use a tripod support for best results. If you have access to a telescope you can try capturing the event using prime focus techniques through the telescope optics.
Settings
Today’s digital cameras are very sensitive to light reflected by the Moon. Use ISO 400 to ISO 800 and a long telephoto lens or zoom setting. Smartphones and point-and-shoot digital cameras will not produce rewarding photos of the eclipsed Moon, but can be useful for taking panoramic shots of your surroundings which include the eclipsed Moon.
Technique
The simplest eclipse pictures can be taken with manual settings on your camera and a normal lens, preferably supported by a tripod. For best results use a cable release to minimize vibration. Images taken in this fashion result in a small lunar image. This is why it is preferable to use a telephoto lens to photograph the Moon. For a 35mm camera try a 200mm lens or something close to this, even better a 500mm lens or higher. You may also use teleconvertors to increase magnification, these typically come in 1.4x and 2x strengths. Their downside is they reduce the effective aperture of your optical system. A 1.4x teleconvertor will decrease your effective exposure by 1 stop, a 2x teleconvertor will decrease your effective exposure by 2 stops. Work out your effective aperture of your optical system ahead of time so you don’t have to think about it on the night of the eclipse.
Example:
| Focal Length | Aperture | Effective Focal Length with 2x teleconvertor |
Effective Aperture with 2x teleconvertor |
| 180mm | 2.8 | 360mm | 5.6 |
| 480mm | 6.8 | 960mm | 13.6 |
To achieve any higher magnification than what is stated above you will have to use a telescope at prime focus. For this your manual camera does need to have the capability of using interchangeable lenses. For prime focus you will use the telescope optics as your interchangeable lens. To attach your camera to your telescope you will need two things a T-adapter that fits your camera and a telescope camera adapter that fits your telescope. The telescope camera adapter is designed to fit in the focusing tube of your telescope and is threaded to accept the T-adapter of your camera. With the magnification involved with telescopic optics it is likely that you will need to use a tracking mount. Preferably the mount should be able to track at lunar speed as opposed to sidereal but if the shutter speeds chosen are shorter than 1 or 2 minutes this is not critical.
Exposure times are the next consideration. The following exposure times are based on a medium speed film and an effective aperture that would be common with a long telephoto and teleconverter combination. Exposures may vary with your equipment based on ISO speed of film used and effective aperture. The Danjon Lunar Eclipse Luminosity Scale has been included to provide better guesstimates for totality.
| Full Moon | 1/250 second at f/16 | ||||||||
| 1st Contact | 1/125 second at f/16 see note 1. | ||||||||
| 2nd Contact | 2 seconds at f/16 see note 2. | ||||||||
| Totality *see table below |
|
||||||||
| 3rd Contact | 2 seconds at f/16 see note 2. | ||||||||
| 4th Contact | 1/125 second at f/16 see note 1. | ||||||||
| L = 1 | dark eclipse; lunar surface details distinguishable only with difficultly | ||||||||
| L = 2 | deep red or rust coloured eclipse; central part of the umbra dark but outer rim relatively bright | ||||||||
| L = 3 | brick-red eclipse; usually with a brighter (frequently yellow) rim to the umbra | ||||||||
| L = 4 | very bright copper-red or orange eclipse, with a bluish, very bright umbral rim | ||||||||
Note 1. 1st and 4th contact times given for the partial phases are biased for the light part of the Moon. Remember you are dealing with vastly different exposures between the light and dark parts of the Moon during eclipse. The bias of about 1 stop minus avoids overexposure of the dominant bright area of the Moon.
Note 2. 2nd and 3rd contact times given for the partial phases are biased for the dark part of the Moon. The bias of about 1 stop plus is a good strategy for negative film not quite so good for slides and digital capture given they don’t tolerate overexposure well.
The exposure times are only recommendations. Remember the cardinal rule about photography … bracket. Always try exposures plus and minus your chosen exposure. This gives you a better chance at getting usable results. Let’s all hope for clear weather. If you have any questions please send email to David Lee at davidflee7331@gmail.com.
David Lee – original image and text
Joe Carr – updated for 2018
Brenda Stuart – illustrations